Sale Models
Configure how sales flow through your system, including states, transitions, and commission rules.
Configure how sales flow through your system, including states, transitions, and commission rules.
Accessing Sale Models
- Ensure you're in your team account
- Click Sale States in the sidebar
- The URL is
https://sellfaster.eu/home/[team]/sale-models
What are Sale Models?
Sale models define the workflow for tracking sales from creation to completion. Each model includes:
- States - The stages a sale can be in (e.g., Sold, Return Period Over, Cancelled)
- Transitions - Allowed movements between states
- Commission Rules - When commission is earned or reclaimed
- Address Actions - How sales affect address status
Viewing Sale Models
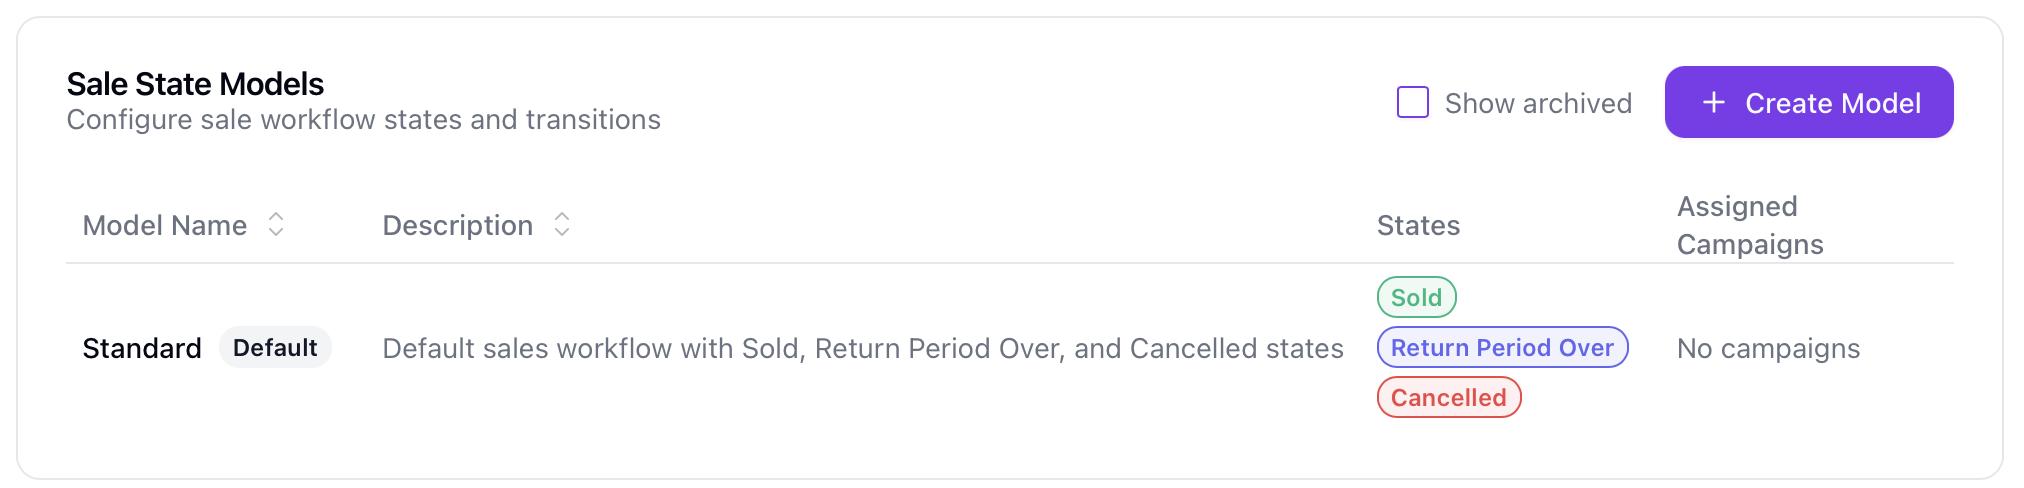
Model List
The table displays:
| Column | Description |
|---|---|
| Name | Model name with "Default" badge if default, "Archived" if archived |
| Description | Model description (optional) |
| States | First 4 states with color badges, "+N more" if additional |
| Projects | Assigned projects (first 3, with count of additional) |
| Actions | Available actions menu |
Filtering Models
By default, archived models are hidden. Toggle Show archived to view them.
Creating a Sale Model
New Model
- Click Create Model
- Enter model details:
- Name (required) - Unique name for the model
- Description (optional) - Purpose of this model
- Configure states (see below)
- Define transitions between states
- Save
Note: Creating models requires the you to have the role
managerorowner.
Default States
New models come with three pre-configured states:
| State | Type | Commission |
|---|---|---|
| Proposal | Initial | |
| Confirmed | Triggers commission | |
| Cancelled | Terminal | Reclaims commission |
You can modify, add, or remove these states as needed.
State Configuration
State Properties
Each state within a model has:
| Property | Description |
|---|---|
| Name | State identifier (max 255 characters) |
| Color | Visual color from preset palette or custom hex |
| Position | Display order (affects dropdown and visualization) |
| Is Initial | Marks the starting state (only one per model) |
| Is Terminal | Marks an end state (sale workflow complete) |
| Allow Editing Contact | If enabled, users can edit lead contact info when recording a sale in this state |
| Max Retention (days) | After this many days the system automatically disconnects the address and clears comments/notes for sales in this state |
GDPR Properties
Two optional GDPR controls can be configured on each sale state.
Allow Editing Contact lets agents modify a lead's contact details while recording or updating a sale in this state. This is disabled by default; only enable it for states where your team has a legal basis for editing personal data.
Max Retention (days) defines how long personal data linked to sales in this state is retained. After the configured period, the system disconnects the linked address and clears comments and notes on those sales. For a complete description of all data-protection settings, see GDPR Settings & Data Protection.
Commission Properties
| Property | Description |
|---|---|
| Triggers Commission | Commission is calculated when entering this state |
| Reclaims Commission | Previously earned commission is reversed when entering this state |
Address Properties
| Property | Description |
|---|---|
| Cancels Address | Marks the address as inactive when entering this state |
| Active Address | Marks the address as active when entering this state |
Managing States
Add a State:
- In the edit dialog, go to the States tab
- Click Add State
- Configure the state properties
- Save
Edit a State:
- Click on the state in the list
- Modify properties
- Save
Remove a State:
- Click the remove button on the state row
- Cannot remove if sales reference this state
Note: Each model must have at least one state and exactly one initial state.
Transitions
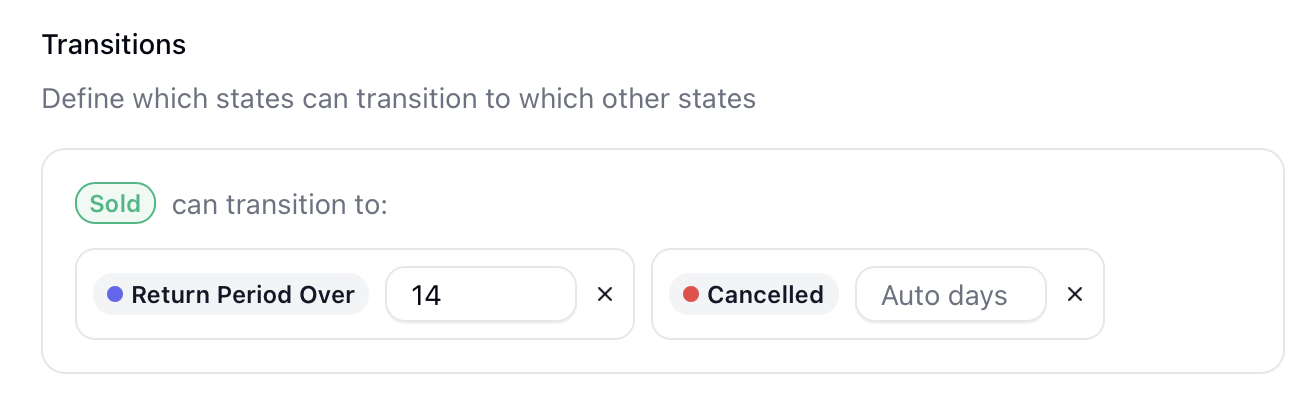
What are Transitions?
Transitions define which state changes are allowed. For example:
- Proposal → Confirmed (allowed)
- Proposal → Cancelled (allowed)
- Cancelled → Proposal (not allowed)
Configuring Transitions
- In the edit dialog, go to the Transitions tab
- For each transition, specify:
- From State - Starting state
- To State - Destination state
- Is Default - Makes this the default transition option
- Auto-Transition Days (optional) - Automatically transition after N days
Auto-Transitions
Set a number of days after which a sale automatically moves to the next state. Useful for:
- Auto-confirming proposals after a waiting period
- Auto-cancelling stale proposals
Editing Models
Edit Model Info
- Click the actions menu on a model
- Select Edit
- Go to the Info tab
- Update name, description, or set as default
- Save
Edit States and Transitions
- Open the Edit dialog
- Use the tabs to switch between:
- Info - Model name and description
- States - Manage state properties
- Transitions - Manage allowed transitions
Visualizing Models
Flow Diagram
View an interactive diagram of your model:
- Click the actions menu on a model
- Select Visualize Flow
- See the state flow diagram
The diagram shows:
- State nodes with colors
- State properties (Initial, Terminal, Commission flags)
- Arrows showing transitions
- Auto-transition days labeled on edges
Campaign Assignments
Assign to Campaigns
- Click the actions menu on a model
- Select Assign to Campaigns
- Toggle campaigns on/off
- Changes save automatically
Note: Each campaign can only have one sale model assigned. Assigning a new model replaces the existing assignment.
Note: Archived models cannot be assigned to campaigns.
Setting Default Model
One model can be marked as the default:
- Edit the model
- Enable the Default checkbox
- Save
The default model is automatically suggested when creating sales. Only one model per team can be default.
Archiving Models
Archive a Model
- Click the actions menu on a model
- Select Archive
- Confirm
When archived:
- Model is unassigned from all campaigns
- Cannot be used for new sales
- Existing sales using the model's states are preserved
- Can be restored later
Note: Models with active sales referencing their states can be archived.
Restore a Model
- Enable Show archived
- Click the actions menu on the archived model
- Select Unarchive
After restoring, reassign the model to campaigns as needed.
Audit History
Team owners can view change history:
- Click the actions menu on a model
- Select View Audit History
- See changes to the model, its states, and transitions
Permissions
| Action | Permission Required |
|---|---|
| View models | everyone |
| Create models | manager and owner role only |
| Edit models | manager and owner role only |
| Assign to projects | manager and owner role only |
| Archive/Restore | manager and owner role only |
| View audit history | Team owner only |
Best Practices
Model Design
- Start simple - Begin with basic states (Proposal, Confirmed, Cancelled)
- Clear names - Use descriptive state names
- Document rules - Add descriptions explaining when to use each state
- Test first - Verify transitions before assigning to active campaigns
Commission Configuration
- Clear triggers - Define exactly which state triggers commission
- Handle cancellations - Always have a state that reclaims commission for cancelled sales
- Consistent rules - Use the same model for similar sales types
Workflow Tips
- Initial state - Always start from a "pending" type state
- Terminal states - Mark final states (Confirmed, Cancelled) as terminal
- Transitions - Only allow logical progressions
- Auto-transitions - Use sparingly and with appropriate timeframes
Troubleshooting
Commission Not Calculated
If commission isn't showing:
- Verify the sale reached a state with "Triggers Commission" enabled
- Check the sale is using the correct model
- Verify commission rules are configured
Related Topics
- Commission - Viewing commission reports
- Recording Sales - Creating sales
- Interaction States - Address interaction states
- Team Sales - Sales management
- GDPR Settings & Data Protection - Configure data retention and handle subject requests