How to Set Up Multi-Factor Authentication (MFA)
This guide walks you through enabling MFA to add an extra layer of security to your account.
This guide walks you through enabling MFA to add an extra layer of security to your account.
What is MFA?
Multi-Factor Authentication (also called Two-Factor Authentication or 2FA) adds security by requiring two things to sign in:
- Something you know - Your password
- Something you have - A code from your authenticator app
This means even if someone gets your password, they can't access your account without your phone.
Prerequisites
Before setting up MFA:
- Install an authenticator app on your phone
- Have your phone accessible
- Be signed in to your account
Recommended Authenticator Apps
| App | Platform |
|---|---|
| Google Authenticator | iOS, Android |
| Microsoft Authenticator | iOS, Android |
| Authy | iOS, Android, Desktop |
| 1Password | iOS, Android, Desktop |
Setting Up MFA
Step 1: Access Security Settings
- Click your profile avatar
- Go to Settings
- Navigate to Security section (scroll down to Multi-Factor Authentication)
Step 2: Start MFA Setup
- Find Multi-Factor Authentication section
- Click Enable MFA or Set Up
- The setup dialog opens
Step 3: Name Your Factor
- Enter a friendly name for the factor
- Example: "iPhone", "Work Phone", "Backup Device"
- This helps identify the factor later
Step 4: Scan QR Code
A QR code appears on screen:
- Open your authenticator app
- Tap + or Add Account
- Select Scan QR Code
- Point your camera at the QR code
- Account is added to your app
The QR code uses your app name as the issuer for easy identification.
Step 5: Enter Verification Code
- Look at your authenticator app
- Find the 6-digit code for Sellfaster
- Enter the code in the verification field (6 digits)
- Click Verify
The system creates a challenge and verifies your code.
Step 6: Confirmation
MFA is now enabled:
- You'll see a success message
- MFA status shows "Enabled"
- Factor appears in your factors list
- Next sign-in will require code
Signing In with MFA
Normal Sign-In Process
- Enter your email and password
- Click Sign In
- MFA verification page appears at
/auth/verify - If you have multiple factors, select which one to use
- Open your authenticator app
- Enter the current 6-digit code
- Click Verify
- You're signed in!
Assurance Levels
The system uses Assurance Levels (AAL):
- AAL1: Password-only authentication
- AAL2: Password + MFA verification
Certain actions may require AAL2 (MFA verification).
Managing MFA
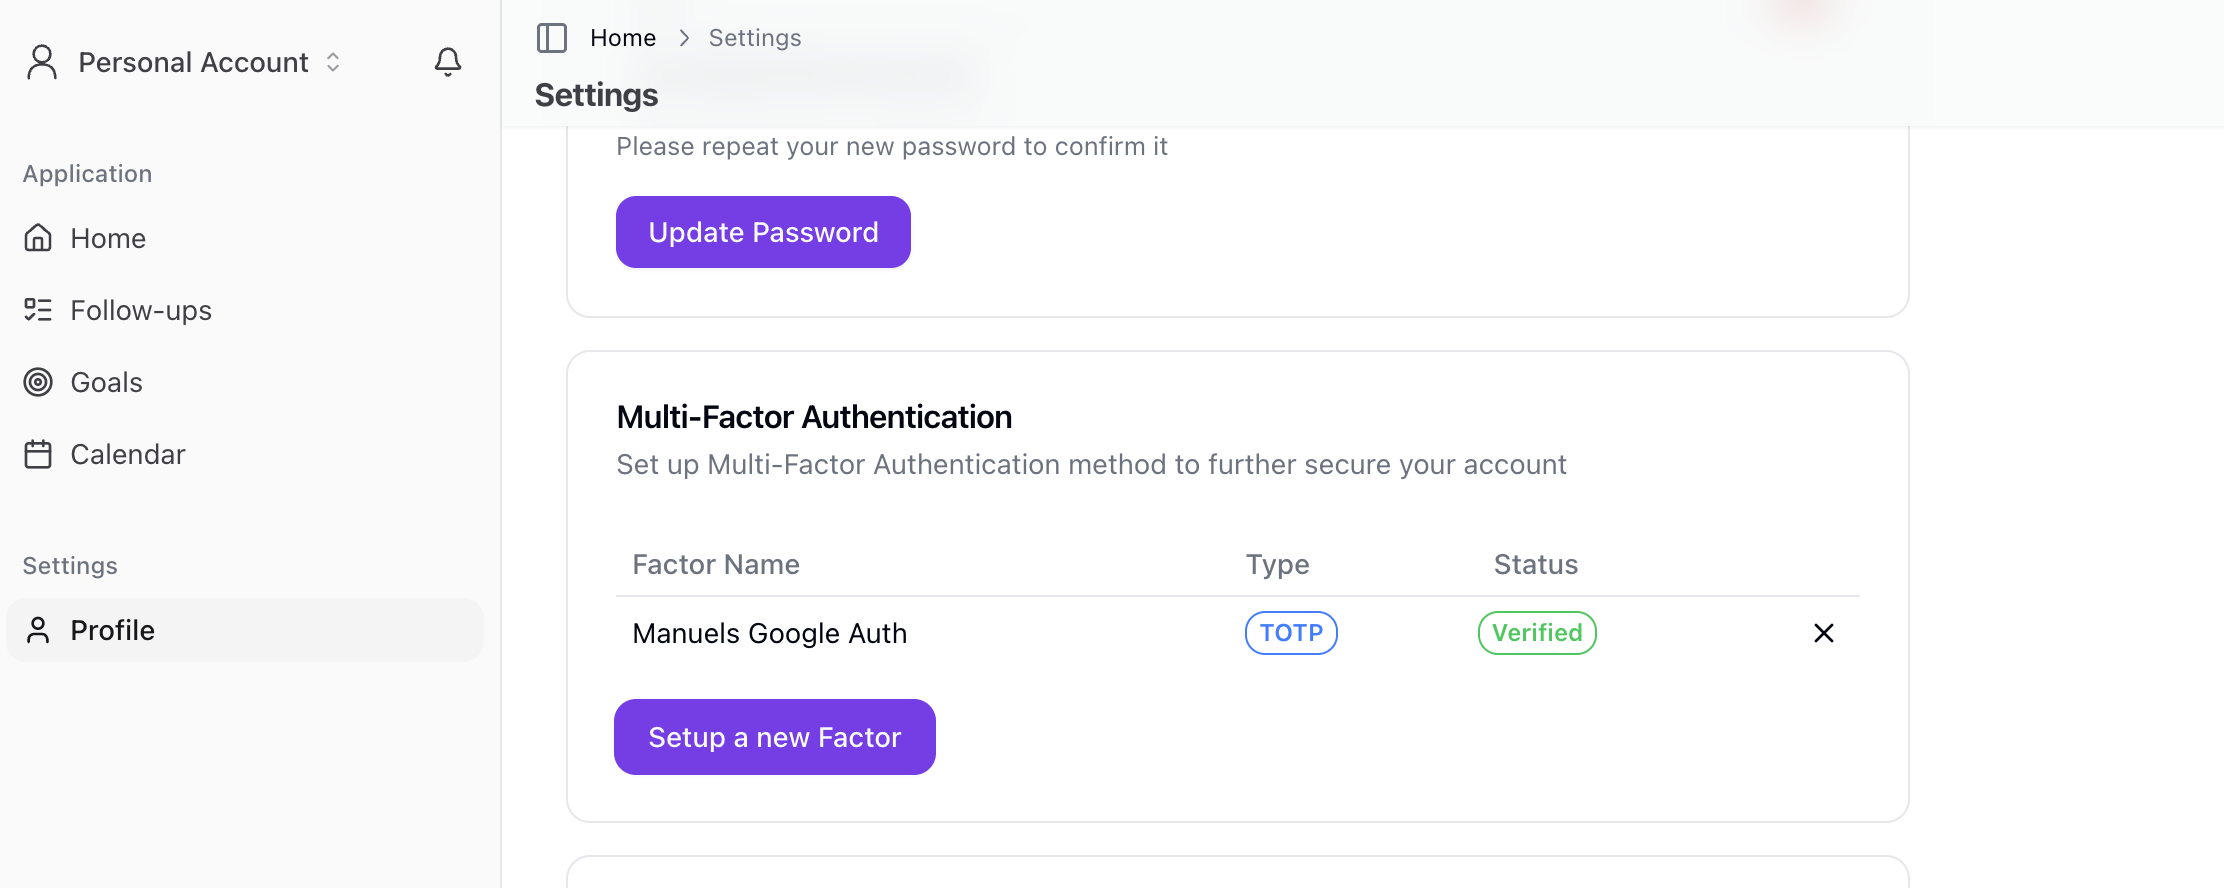
Viewing MFA Status
Check your enrolled factors:
- Go to Settings > Security
- See list of enrolled factors
- Each shows: friendly name, factor type (TOTP), and status
Factor Table Columns
| Column | Description |
|---|---|
| Name | Your friendly name for the factor |
| Type | TOTP (Time-based One-Time Password) |
| Status | Verified or Unverified |
| Actions | Delete/Unenroll |
Disabling MFA (Unenrolling)
To remove a factor:
- Go to Settings > Security
- Find the factor in the list
- Click Delete or the delete icon
- Confirm the deletion
- Factor is unenrolled
Note: Removing all factors disables MFA for your account.
RLS and MFA Requirements
Super Admin Access
Super admins are required to have MFA enabled:
- The
is_super_admin()function requires AAL2 - This ensures privileged operations have enhanced security
MFA Compliance
The system has an is_mfa_compliant() function:
- If you have verified MFA factors, AAL2 is required
- Without MFA factors, AAL1 is sufficient
- This applies to various sensitive operations
Protected Tables
MFA compliance policies apply to:
- Accounts
- Account memberships
- Subscriptions
- Subscription items
- Role permissions
- Invitations
- Orders
- Order items
- Notifications
Troubleshooting
Code Not Working
If your code isn't accepted:
- Check the time - Codes change every 30 seconds
- Wait for new code - Try the next one
- Verify correct account - Right entry in app?
- Check phone time - Must be accurate
Phone Time Issues
TOTP codes depend on accurate time:
- Check your phone's time settings
- Enable automatic time
- Restart your authenticator app
- Try again
Lost Phone
If you lose your phone:
- You'll need to contact support for identity verification
- After verification, MFA can be reset
- Set up MFA again with a new device
Codes Always Rejected
If codes never work:
- Check your phone's time settings (must be accurate)
- Enable automatic time sync
- Disable MFA and re-enable (if you can still access)
- Try a different authenticator app
Factor Won't Delete
If you can't remove a factor:
- Verify you're authenticated
- Check for any errors in the console
- Try refreshing the page
- Contact support if issue persists
MFA Best Practices
Security Tips
- Always enable MFA - Extra protection for your account
- Secure your phone - Lock screen, biometrics
- Backup your authenticator - Some apps support cloud backup
- Use descriptive names - Makes managing multiple factors easier
What If You Change Phones?
When getting a new phone:
- Before wiping old phone:
- Transfer authenticator accounts if app supports it
- Or keep old phone accessible temporarily
- After setting up new phone:
- Install authenticator app
- Go to Security settings
- Unenroll old factor
- Enroll new factor with new device
Multiple Factors
Consider adding multiple factors:
- Primary phone
- Backup device
- Different authenticator apps
If you have multiple factors, you can choose which one to use during sign-in.
Technical Details
TOTP Standard
Sellfaster uses TOTP (Time-based One-Time Password):
- Codes change every 30 seconds
- 6-digit codes
- Standard algorithm compatible with most authenticator apps
Authentication Flow
- User enters password (AAL1)
- If MFA required, redirected to
/auth/verify - User selects factor (if multiple)
- User enters TOTP code
- System verifies via
challengeAndVerify - Session upgraded to AAL2
Related Topics
- Security Settings - Full security options
- Signing In - Authentication
- Password Reset - Password recovery